Our Process
Phase 1: Excavation
Excavation is the first step in a new construction project. The process of excavating is to move earth using machines and tools. This includes dirt, rock, trees, stump/roots, etc. Excavation uses unique machines to create grading for building foundations, reservoirs and roads.
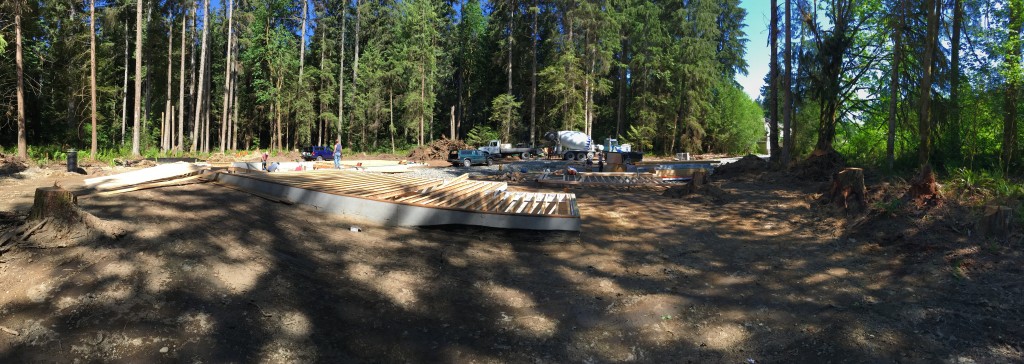
Before breaking ground, the site must be carefully inspected. All utilities, if applicable, must be marked. A preconstruction conference is required for all commercial and multifamily projects and may be required for single-family projects with significant site and building issues such as wetlands, shorelines, floodplain, geotechnical, steep-slope, erosion hazard, drainage, excavation near a property line, etc. A notice and condition will be added to the permit package if a preconstruction conference is required.
After the preconstruction conference, plans are engineered for the sizing and depth of the site. The site’s boundaries will be clearly marked, TESC (erosion and sediment control) and drainage setup. Once these items are address and inspected, the site footprints will be staked and excavation can begin.
Phase 2: Foundation
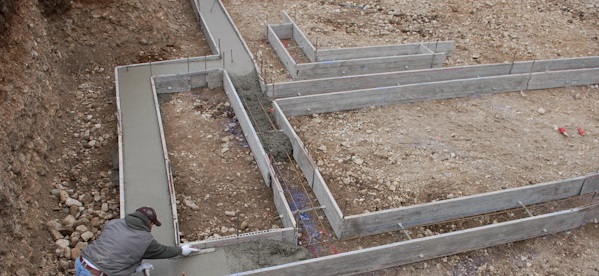
Foundations transfer the weight of the building to the ground. Foundations are designed to have an adequate load capacity depending on the type of subsoil supporting the foundation by a geotechnical engineer, and the footing itself may be designed structurally by a structural engineer.

To ensure the ground can support the foundation and building weight, a soil investigation will be completed to study the properties of the soil. This investigation report will describe at what depth the foundation should be set at. This is completed in the preconstruction conference.
The foundation inspection occurs after the building pad excavation has taken place. For concrete foundations, forms and reinforcing steel must be in place. Inspection approval is required prior to placement of concrete. For pole structures, the holes must be excavated and cleaned out. For pile foundations, special inspection by an approved agency is usually required. At the foundation inspection, inspectors check building placement per the approved plan, setbacks (from property lines, easements, critical areas and buffers, etc.), soil conditions, ESC, critical areas requirements, forms and reinforcing steel, hold downs and special frame anchors, and any other requirements specified in the approved plans and permit conditions. Property lines must be identified by the owner or contractor.
Foundation footings are poured. Footings are wider than the foundation walls and spread the weight of the building from the foundation walls to the ground. The footings will form the perimeter of the building. Plumbing lines are ran from the street into the building’s basement, either over or under the footings.
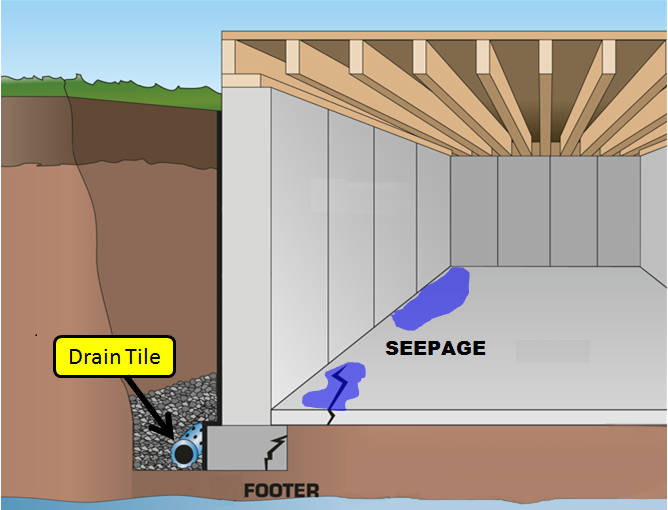
A sub slab is then poured over the plumbing lines and a rigid foam insulation layer. Subsurface water is collected and moved away from the foundation to prevent pooling water or flooding. The foundation drainage tile is made up of an uninterrupted run of punched drainage pipes that have been embedded in gravel along the foundation of the building. In some regions a sump pump may also be required to help collect the subsurface water.
Next, forms will be constructed for the foundation walls. The forms hold the wet concrete stationary while it hardens to its’ full strength. The structural engineer will determine the width and heights of the foundation walls. Anchor bolts, ufer rod and beam pockets needed to attach and support the framing to the foundation will be embedded into the foundation at the time of pouring.
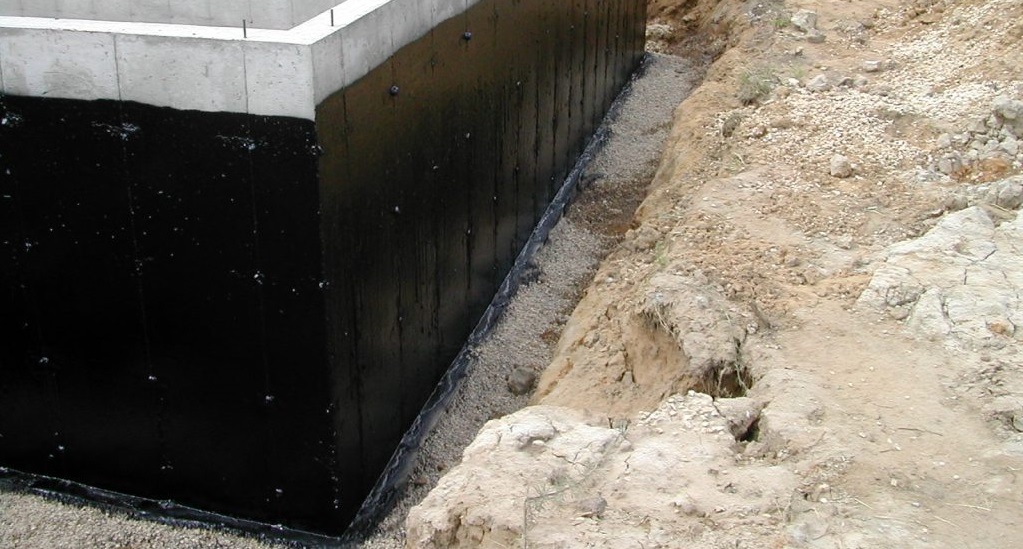
The foundation walls will be strengthened by pouring a 3-4 inch slab between the walls. The walls will also be waterproofed using a sealant coating. Once the waterproofing is complete, back fill can be done around the foundation.
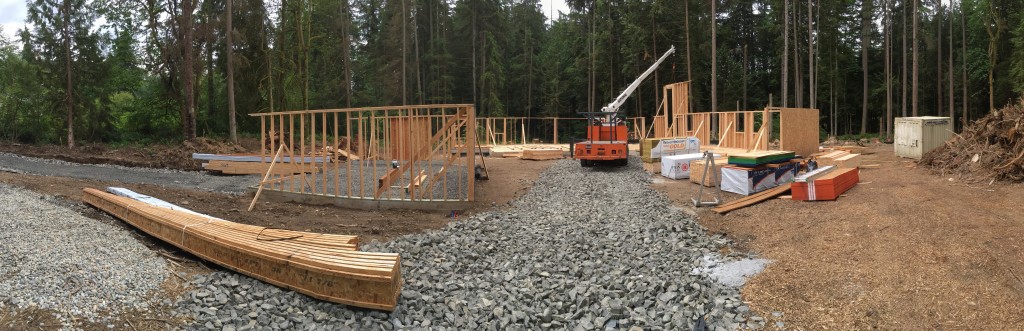
Phase 3: Framing
Framing is the fitting together of pieces to give a structure support and shape.[1] Framing materials are usually wood, engineered wood or structural steel. This is collectively known as the shell or skeleton of the house. Plywood or oriented strand board (OSB) sheathing is applied to the exterior walls and roof, and windows and exterior doors are installed.
Windows are installed before siding put up. The windows are wrapped with a waterproof membrane (i.e. Vycor or Moistop). This descreases the chance of moisture penetrating into the framing of the house.
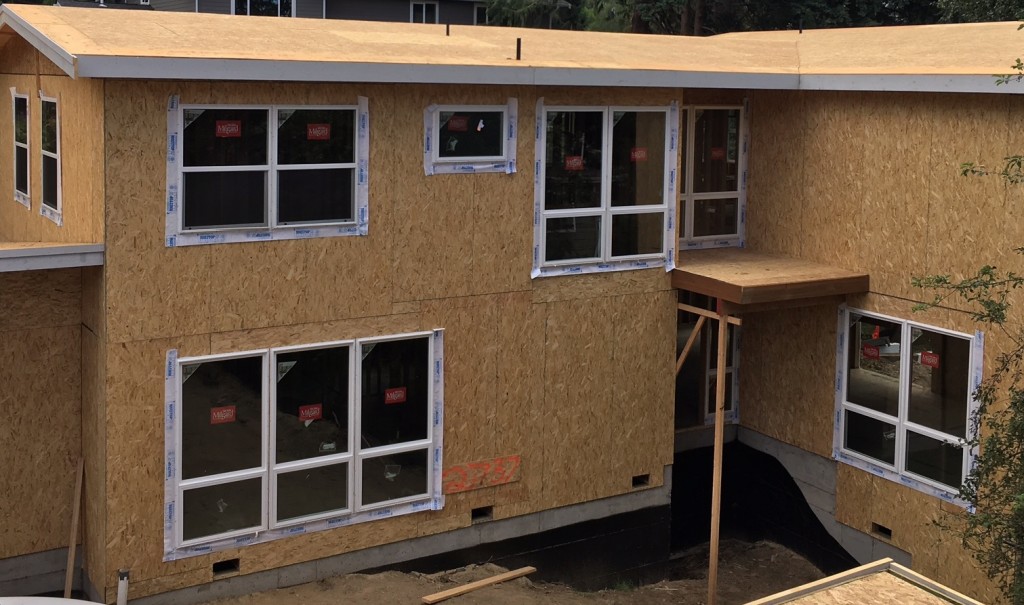
The sheathing is then covered with a protective barrier known as a house wrap; much like the window wrap, it prevents liquid water from infiltrating the structure, while allowing water vapor to escape. This reduces the likelihood of mold and wood rot.
Phase 4: Rough Mechanics
The rough in mechanics stage involves the HVAC, plumbing, low-voltage and electrical contractors. The general contractor will walk the site with the sub-contractors before any work begins. These discussions will include custom options and locations of: returns, air conditioning condensers, air handlers, toilets , hose bibs (the outside faucet that your hose connects to), lighting and switches.
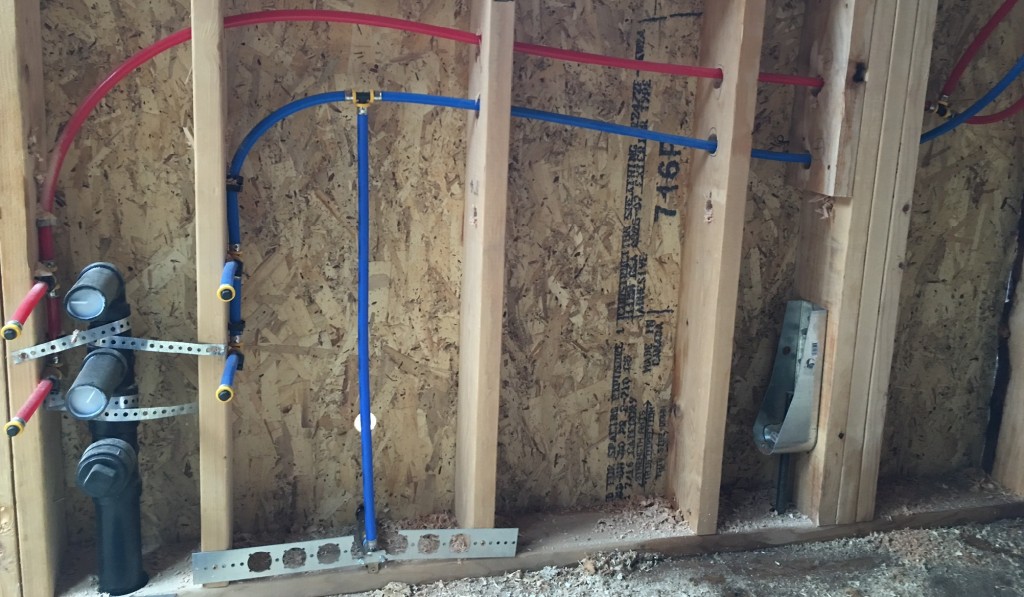
During this stage of construction, the house will be very busy with contractors. Each trade is installing their piping and wires. The wiring and piping are like highways for the utilities, navigating throughout the house. At times it happens that lines running concurrently or crossing one another can require more room than is available; experienced and cooperative trade partners will collaborate and work out solutions. Each trade is required to have an inspection before the insulation can be installed. HVAC must be finished before roofing can be installed.
Phase 5: Insulation
Insulation plays a key role in creating a more comfortable, consistent indoor climate while significantly improving a home’s energy efficiency. One of the most important qualities of insulation is its thermal performance or R-value, which indicates how well the material resists heat transfer. Most homes are insulated in all exterior walls, as well as the attic and any floors that are located above unfinished basements or crawl spaces.
The most common types of insulation used in new homes are fiberglass, cellulose and foam. Depending on the region and climate, your builder may also use mineral wool (otherwise known as rock wool or slag wool); concrete blocks; foam board or rigid foam; insulating concrete forms (ICFs); sprayed foam; and structural insulated panels (SIPs).
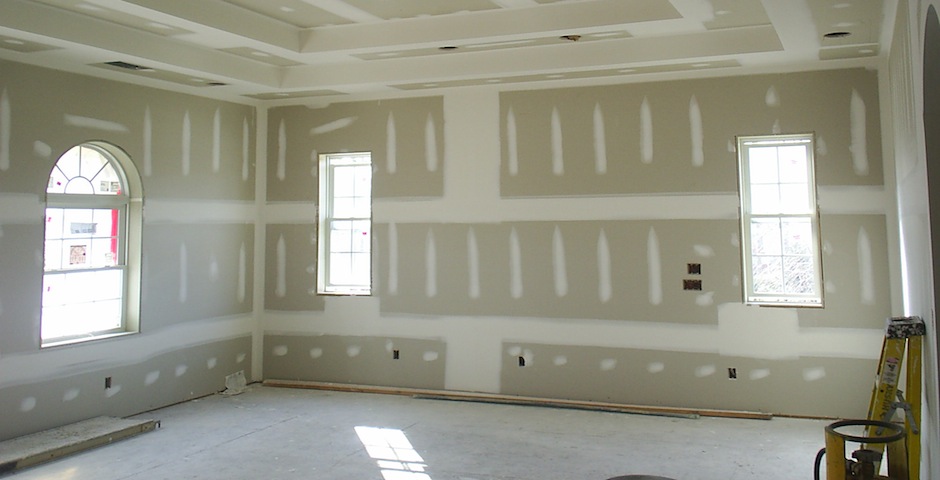
Phase 6: Drywall
After insulation has been inspected and passed, the drywall sheets can be hung. An inspection of sheet-rock nailing will be performed before continuing onward. Following the inspection, the seams of each sheet are taped and mudded. Once the mud is dry, it is sanded down to a create a smooth transition between the two adjacent sheets. Cutouts will be made in the drywall for outlets, lighting fixtures, HVAC, etc. At this stage, you will get a good feel for how the interior of the house will look.
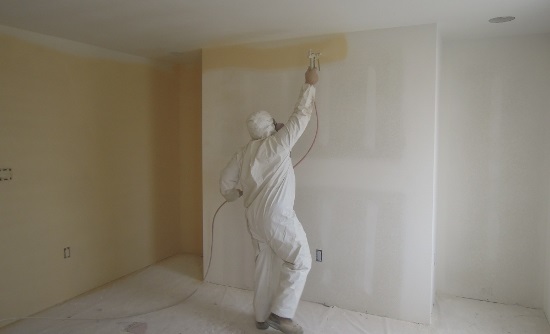
Phase 7: Preliminary Painting
Once all of the drywall work is completed, it is time to paint. The first layer of paint applied is a primer layer to the ceiling and walls. Next 2 coats of paint, depicted on a paint schedule, is applied to the ceiling and walls.
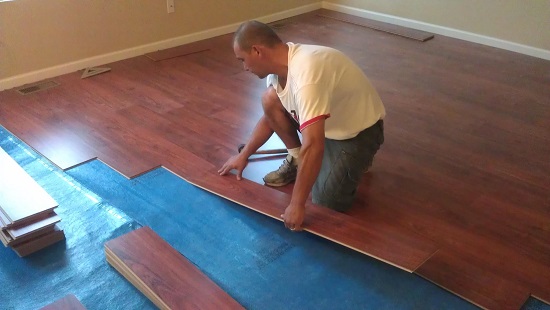
Phase 8: Flooring
The flooring includes Carpet, Tile, Stone, Hardwoods, Engineered Hardwoods, Bamboo, Cork, Linoleum/Marmoleum or Vinyl. The floor is cleaned of debris/dust, sanded smooth and dried. The flooring is installed per best practices installation guides. Once the flooring is installed, carpet wrap, paper or ram board is laid down to protect the flooring while the finishing carpentry (Cabinetry, Appliances, Trim) is installed.
Phase 9: Interior Painting
The interior painting will be the bulk of the painting workload. This is when the walls will begin to move from primer white to the final colors of the home. The floors and windows are masked off to provide protection from the paint. The paint is then sprayed on the walls/ceiling. The room must be cleared to allow the painters to spray in a continuous motion giving a smooth application.
![]()
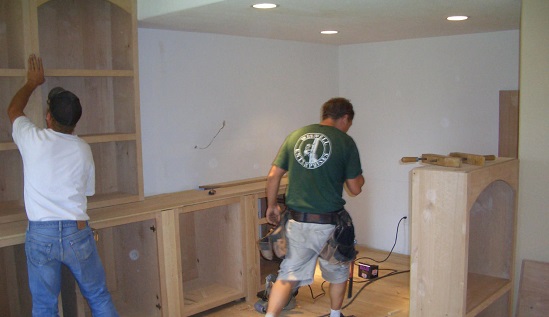
Phase 10: Cabinetry, Finishing Carpentry, Appliances/Mechanics
Once the final paint has been applied, the finishing carpentry begins. The cabinets, trim, appliances, lighting fixtures and counter-tops will be installed at this point.
Phase 11: Touch Up
After all the finishing carpentry is completed, the last step is the final walk through and touch up work. This is where the General Contractor, Project Manager and Homeowner will walk through the house and go over each room. Items that need to be completed/reworked/fixed will be address during this walk-through. Some items might include: nail pops, raised nail-heads/screws, paint detail, etc.
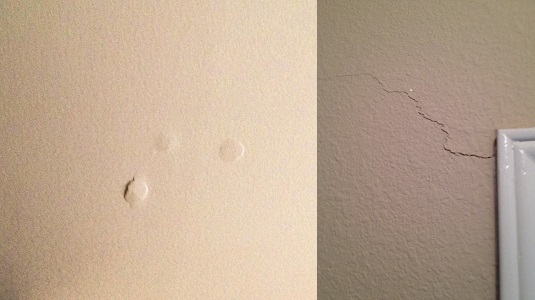
Note: Settling is a common factor is building a home. After the construction is completed, the house will settle a bit, causing nail pops and slight cracks in drywall. These items are addressed in the following months after construction has ended.